(NPR) Non-photorealistic Rendering Most computer graphics work - - PowerPoint PPT Presentation

npr non photorealistic rendering
SMART_READER_LITE
LIVE PREVIEW

(NPR) Non-photorealistic Rendering Most computer graphics work - - PowerPoint PPT Presentation

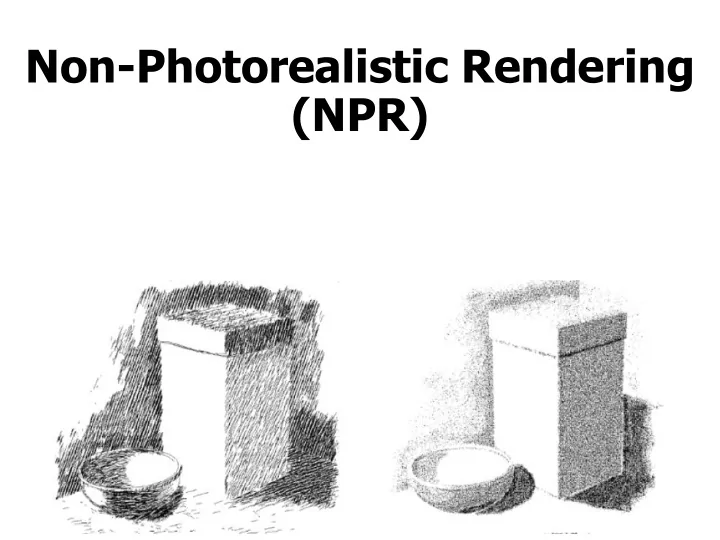
Non-Photorealistic Rendering (NPR) Non-photorealistic Rendering Most computer graphics work strives for photorealism Other types of depiction can be more expressive or artistic NPR Technical Illustration Illustrate important


slide-1
SLIDE 1

Non-Photorealistic Rendering (NPR)

slide-2
SLIDE 2

Non-photorealistic Rendering

 Most computer graphics work strives for

photorealism

 Other types of depiction can be more

expressive or artistic

slide-3
SLIDE 3

NPR – Technical Illustration

  • Illustrate important features
slide-4
SLIDE 4

NPR – Painterly Rendering

  • Make it look like being created using brush

strokes and paint

slide-5
SLIDE 5

NPR – Sketchy Rendering

  • Make it look like being created with pencil sketch
slide-6
SLIDE 6

Shape Abstraction by Lines

  • Boundary Lines
  • Silhouette Lines
  • Creases
  • Material Edges
slide-7
SLIDE 7

Shape Abstractions by Lines

  • Various line styles can be used
slide-8
SLIDE 8

Shape Abstraction by Shading

Regular OpenGL Gouraud Shading Tone Shading

slide-9
SLIDE 9

Shape Abstraction by Shading

  • More effective when combined with lines
slide-10
SLIDE 10

Shape Abstraction by Textures

slide-11
SLIDE 11

Shape Abstraction by Textures

slide-12
SLIDE 12

Feature Line Detection

  • Image space method – analyze the rendered images
  • Object space method – analyze the mesh
slide-13
SLIDE 13

Image Space Method

  • Analyze the depth buffer – look for depth discontinuity

using edge detector

slide-14
SLIDE 14

Image Space Method

  • Analyze the Normal Map – convert surface normal

(x,y,z) to (R,G,B) and then detect the color discontinuity

slide-15
SLIDE 15

Image Space Method

  • Better result can be obtained if both edges are

combined

slide-16
SLIDE 16

Edge Detector

  • Discontinuity in depth map or normal map

can be detected using edge detector

Ix(x,y) = I(x,y) x Sx; Iy(x,y) = I(x,y) x Sy IM = sqrt ( Ix(x,y) + Iy(x,y) ) Get edge by thresholding IM

2 2

slide-17
SLIDE 17

Image Space Method Problem

  • For a folded piece of a paper, the edge cannot be

detected

slide-18
SLIDE 18

Object Space Method

  • Mainly used to detect silhouettes and creases
  • Silhouettes: edges that connect front and back

faces

  • Creases: A discontinuity on an otherwise

smooth edges

slide-19
SLIDE 19

Silhouette

  • For a smooth surface, a silhouette can be defined

as:

  • N. (X-E) = 0 ; N: normal, X: silhouette point; E:

camera

slide-20
SLIDE 20

Software Method

  • Detect Silhouettes from all triangle edges
  • For each vertex, evaluate:
  • d = n. (x-e) / |n|*|(x-e)|
  • s = + if d >0; else –
  • Find s = 0 along face edges
slide-21
SLIDE 21

Software Method

slide-22
SLIDE 22

Hardware Method

  • Use OpenGL to draw silhouette edges (no explicit

search)

  • Pseudo code (a three pass method)

draw shaded front faces draw front faces in line mode, set stencil draw back farces in line mode at where stencil was set; decrementing stencil

slide-23
SLIDE 23

Hardware Method

  • Reduce to 2 pass by push the backface forward

(z bias)

Eye front back visible backface Angle dependent Use glPolygonOffset

slide-24
SLIDE 24

Issues of the Previous Method

  • Non-uniform z resolution needs to be taken care of –

translate by k*z;

  • K: a scaling factor, z: the polygon distance
  • The width of the line width will depend on the
  • rientation of the back-facing polygon and front-facing

polygon

  • Raskar and Cohen – fatten the back-facing polygons
slide-25
SLIDE 25

Raskar and Cohen’s Fix

  • The back-facing polygon edge is pushed
  • utwards

v F B F B Nb The distance to push only depends on the orientation of back-facing polygon By Offset = K * z/V.Nb

slide-26
SLIDE 26

Raskar and Cohen’s Fix

  • In fact, each of the polygon edges needs to be pushed

by a different amount: z*sin(a)/V.Nb; where cos(a) = v.e, e is the polygon edge vector

slide-27
SLIDE 27

Charcoal Effect

  • Tessellate the polygon

to smaller pieces

  • Also fatten front-

facing polygons with 0<N.V<0.1

  • Assign color I =

(1+V.N)/3

slide-28
SLIDE 28

Illustration Example

slide-29
SLIDE 29

Line Weight

  • Some possible choices:
  • Single line weight used throughout the

image

  • Two line weights, with heavier describing

the outer edges (boundary and silhouette)

  • Various light weight along a single line,

emphasizing perspective effect (heavy lines in the foreground, tapering toward the farther part of the object)

slide-30
SLIDE 30

Line Weight

slide-31
SLIDE 31

Line Color

  • Attempt to incorporate

shading

  • Interior lines can be

drawn in white, simulating highlight

slide-32
SLIDE 32

Tone Shading

  • The standard Phong Shading model is not always

satisfactory

Problems in regions where N.L < 0

  • Only Ambient Colors are seen
  • Difficult to deduce shapes
  • Object outlines cannot be seen
slide-33
SLIDE 33

Two ad hoc Solutions

  • Hand-tuned ambient color
  • Just highlights and edge lines

Ambient is only a constant  Not enough surface detail 

slide-34
SLIDE 34

Effective Shading Model Needed

  • Shading Model is insufficient
  • Lost shape information
  • Especially in the areas of subtle curvature

(small claws above)

  • Not automatic, lots of hand-tuning
slide-35
SLIDE 35

Tone Shading Goals

  • To include shading in an image with back edge

lines and white highlights visible

  • Use a compressed dynamic range for shading
  • Use color visually distinct from black and white
slide-36
SLIDE 36

Reduce Dynamic Range

  • One way to compress dynamic color range is to use

colors of different tones

  • Add gray to a color to generate different tones

Unnatural color Lack of luminance difference

slide-37
SLIDE 37

Create Undertone

  • To further differentiate different surface orientations, we

can use cool to warm color undertones

  • Cool colors – blue, violet, green
  • Warm colors – red, orange, yellow

warm cold

slide-38
SLIDE 38

Test Your Perception

Which color (yellow or blue) seems closer?

slide-39
SLIDE 39

Test Your Perception

What about now?

slide-40
SLIDE 40

Blend Tone and Undertone

  • Add warm-to-cool undertone to a red object
slide-41
SLIDE 41

Use Warm-to-cool Undertone

  • We can modify the diffuse Phong Lighting Model (Blend

cool and warm color )

I = (1 + L.N)/2 * Kcool +(1- (1+L.N/2)) * Kwarm

The Light vector should be place in perpendicular to the gaze direction (usually place at up and to the right)

slide-42
SLIDE 42

Tone Shading Equation

  • Kcool = Kblue + aKd (undertone and tone)
  • Kwarm = Kyellow + b Kd (undertone and tone)

Kblue = (0,0,b) b in [0,1] Kyellow = (g,g,0) g in [0,1] a and b are user-specified parameters Kd is the object diffuse color