
SLIDE 1
TRAINING Contents 1. Key Selling Points 2. Key features 3. - - PowerPoint PPT Presentation
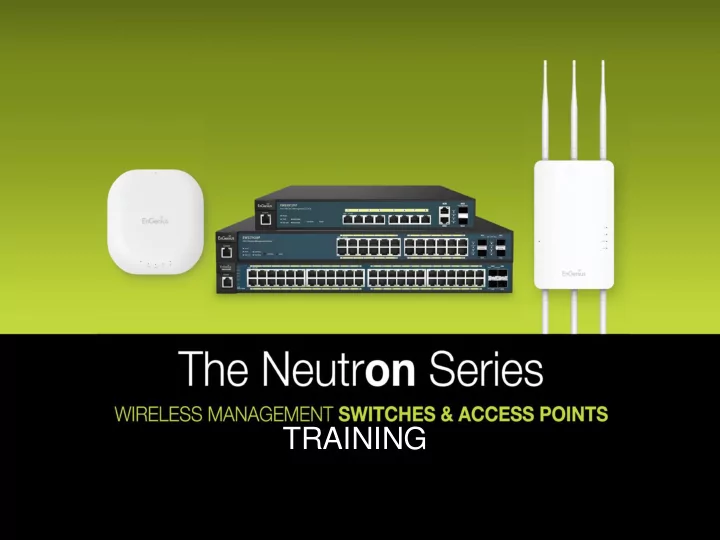
TRAINING Contents 1. Key Selling Points 2. Key features 3. Wireless Management feature list 4. Planning and designing 5. Deployment Methods 6. Maintenance Methods 7. Q& A 8. Questionnaire EnGenius Wireless Management Switch Series Max
Model Max APs MCU RJ45 SFP
PoE Support
PoE Ports Max 802.3 af Max 802.3 at PoE Budget Power Type Housing
EWS5912FP
20 RTL8380M 10 2 af/at 8 8 4 130w Internal 1U 13” 230mm, Metal
EWS7928P
50 RTL8382M 24 4 af/at 24 12 6 185w Internal 1U 19” 260mm, Metal
EWS7928FP
50 RTL8382M 24 4 af/at 24 24 12/24 370w /740w Int./Redunda nt 1U 19” 310mm, Metal
EWS7952FP
50 RTL8393M 48 4 af/at 48 48 24 740w Internal 1U 19” 410mm, Metal
EnGenius EWS Wireless Management Switch supports a wide portfolio of standard EnGenius Dual- Band access points allowing customers to choose the most suitable access points for their needs, whether indoors
provide the best wireless coverage, as well as an upgrade path for future models as technology advances.
Product No. Wireless Standard Product Description EWS210AP 802.11b/g/n 2.4GHz Wireless N300 Managed Indoor Access Point EWS310AP 802.11a/b/g/n Dual Band Wireless N600 Managed Indoor Access Point EWS320AP 802.11a/b/g/n Dual Band Wireless N900 Managed Indoor Access Point EWS360AP 802.11a/b/g/n/ac Dual Band Wireless AC1750 Managed Indoor Access Point EWS660AP 802.11a/b/g/n/ac Dual Band Wireless AC1750 Managed IP55 Outdoor Access Point EWS860AP 802.11a/b/g/n/ac Dual Band Wireless AC1750 Managed IP68 Outdoor Access Point
Low total cost of ownership Integrated AP Controller and L2 PoE Switch functions in one powerful
deployment, operations, and management of wireless network. No additional license needed. Simple to use, simple to manage Centralized management, quick setup, easy to configure user friendly GUI, no need for an IT expert to install. Scalable centralized wired/wireless network architecture Manages up to 50 Wireless APs per switch, EWS also takes the role of a full featured L2 PoE Switch. Robust wired/wireless security
One click troubleshooting and management
Wireless Network Management
Wireless Configuration
, WPA / WPA2 Enterprise, WPA-PSK / WPA2- PSK)
Wireless Network Monitoring
Wireless Network Security
Management
EWS7928P / EWS5912FP / EWS7952FP
PoE+ L2 Wireless Management Switch
EWS7928P / EWS5912FP / EWS7952FP
PoE+ L2 Wireless Management Switch
EWS310AP EWS310AP EWS310AP EWS310AP EWS310AP EWS310AP EWS310AP EWS310AP EWS310AP
Planning with EWS is simple by using the visual monitoring method. With the ability of combining the topology with floor view it enhances the usage of applying diagram to indicate the location of the Access Points.
Using the floor View, images of layout can be imported and allow the indication of the position of the Access Point
Using the Map View which uses google map, it allows ease of Outdoor
location of map is Taiwan until the EWS is able to get a gateway to the internet to set its actual location at site.
EWS310AP EWS310AP
EWS310AP EWS7928P / EWS5912FP / EWS7952FP
PoE+ L2 Wireless Management Switch
Initial setup using Power Budget to calculate the number of Access Point which is link the to EWS Wireless Management Switch EWS Switch PoE Switch Power Budget EWS210AP EWS310AP EWS320AP EWS5912FP 8 ports 130Watt 8 8 7 EWS7928P 24 ports 185Watt 24 15 10 EWS7928FP 24 ports 370Watt 24 24 20 EGS7952FP 48 ports 740Watt 48 48 40
EGS7228P / EGS5212FP PoE+ Layer 2 Switch
Data Connection
AP AP AP AP AP AP AP
EGS5110P / EGS2110P / EGS2108P PoESmart Switch
EWS7928P / EWS5912FP / EWS7952FP / EWS7928FP Power + Data Connection
EWS310AP EWS310AP EWS310AP EWS310AP EWS310AP EWS310AP
EGS7228P / EGS5212FP PoE+ Layer 2 Switch
Data Connection
EGS5110P / EGS2110P / EGS2108P PoESmart Switch EWS7928P
Power + Data Connection
EWS7928FP EWS5912FP EWS7952FP
50 50 50 20
EWS310AP EWS310AP EWS310AP EWS310AP EWS310AP EWS310AP EWS320AP EWS320AP EWS320AP
This network deployment managed up to 170 APs. Please note that the EWS Switches manages the AP based on “1st come 1st serve” basis. Therefore, the 171th AP which that is “plugged” in last cannot be managed.
First step to site survey using InSSider to conduct surround scan to check what channels have been used before implementing fast handover or any implementation of POC.
NOTE: If the 2.4GHz radio is set to “Auto”, it will scan in sequence of 1,6,11 While for 5GHz, it will scan all available channels depends on the country domain that you set.
With fast roaming, a full authentication method is required to establish the initial client connection, after which the fast roaming technique can subsequently be used when roaming between APs to minimize perceptible delay during re-association (by distributing and caching PMKSA on neighbor APs). The techniques optimizes latency-sensitive applications such as wireless voice over IP (VoIP).
This Method of Needs a RADIUS Server to facilitate the authentication.
NOTE: Fast Roaming only works with Encryption WPA/WPA2 Enterprise and above.
Total Bandwidth : 20M No. of AP : 6 Bandwidth allocated per AP: 3MB Client allocated per AP: 54 Client allocated per radio band: 27
Traffic shaping allows you to limit the upload and download speed at the AP’s LAN port and also speed allocated to each RADIO bands.
Using Traffic shaping to control the bandwidth of the Access Point in the cluster to allow even distribution of the allowable bandwidth. Recommendation: You may want to limit upload speed.
NOTE: The more client you set each band, the lesser bandwidth is given to each client. For Email, Twitter, Facebook and Normal internet browsing is 256 kbps.
Using Band Steering to load balance the number of the wireless client connecting to the Access Point by identifying the 5Ghz user to automatically connect to the Access Point via 5Ghz and off loading the 2.4Ghz band.
During Planning the EWS provide detail visual monitoring of the Access Point. By Analyzing these statistic you will be able to understand the usage pattern and do Load Balancing. You may standby additional AP to cater for peak hours. Meeting Room E seems to have high traffic Further detail analysis can be deduce from the number clients and the total throughput used
This Client may be HOGGING the AP??
NOTE: Please ensure your EWS switch and AP is already upgraded to the latest firmware version. Always upgrade EWS switch then follow by the APs.
Use the Controller/Switch tab on the upper left corner to toggle between the Wireless Controller
The Dashboard on the upper right corner of the GUI shows the current status of Neutron Series APs that has been managed by the Neutron Series Switch.
At the top right corner of the Graphical User Interface (GUI) is the search bar which you can use to find and jump to any of the Switch or Controller management features. When you type in a word, all possible results for that word in the navigation pane will appear. Click on the results from the drop down list to open that management tab.
The EWS Switch Series had the ability to detect the AP through MAC address. For provisioning of the AP , click the check box and add the AP to the EWS switch management list. A pop out box indicating IP Assignment to assign the IP addresses to the selected EWS AP . DHCP server will be needed for the auto IP assign to the AP Static IP address can be configure on the manual IP address assign to the AP
Displays status of managed Access Points including Device Name, MAC Address, IP Address, Tags, Last Updated Time, Cluster Group. Users can show/hide fields, and also can arrange the list into ascending/descending order. By clicking on the Device Name or Cluster Group, users will be redirected to the relevant device setup page. Also present is a Search box which can be used to search for the Status, Name, MAC, IP , Tag, Cluster of all managed devices. Much more time saving than browsing the whole list one by one.
EWS7928P / EWS5912FP / EWS7952FP
PoE+ L2 Wireless Management Switch
Cluster name: Guard house Cluster name: Office Building 2 Cluster name: Office Building 1
EWS7928P / EWS5912FP / EWS7952FP
PoE+ L2 Wireless Management Switch
EWS310AP EWS310AP EWS310AP EWS310AP EWS310AP EWS310AP EWS310AP EWS310AP EWS310AP
Multi floor building with rooms aligned side by side
1st Floor 2nd Floor 3rd Floor Cluster name: Floor 1 Cluster name: Floor 2 Cluster name: Floor 3
Before pre-configuration you should already design how you will cluster the APs so you can PUSH the settings to each CLUSTER. You may vary settings based on AREA, FLOOR, LOCATION or BUILDING. This will help you better maintain and locate your Clusters. Name Clusters based
location or Building Input more details in the Description
Clusters to help you better differentiate and manage them
You may need to override certain parameters in the process of pre- configuration or during maintenance due to dynamic environment. Overriding changes on individual Access Point can be made on 2.4Ghz and 5Ghz wireless mode, Channel HT Mode, Extension Channel, Channel, Transmit Power, Client Limit and Data Rate.
Once All Aps is configured and deployed, it is recommended that we should evaluate the Network configuration again in the TOPOLOGY VIEW to ensure accuracy.
The EWS wireless management switch can be use as a maintenance tools as well for easy monitoring and diagnostics using the topology view which show indication of the Access Point status with indicator showing ‘Online’, ‘Offline’ or ‘Busy’
rebooting
change
You can individually reboot, Quick config an AP and View the clients
No WiFi (Indoor Access Point) During no wifi situation, using the EWS floor view to monitor the cause of no wifi which could be due to Access Point failure as shown below with those gray out icon which is offline
No WiFi (Outdoor Access Point) During no wifi situation, using the EWS MAP view to monitor the cause of no wifi which could be due to Access Point failure as shown below with those gray out icon which is offline
The EWS allows the administrator to have a quick view of situation when user complain of not able to obtain IP or intermittent wifi connection by checking the Access Point with just a click of a mouse on the selected Access Point. AP with issues will have lesser client connected compared to the neighboring APs.
By clicking the Active Client List from the Access Point, it will show indications
RSSI level of the wireless client. From these readings it would determine if the user is connected to the Access Point or having weak signal strength
Using Topology View, the EWS allows quick visual of Access Point that is offline which could indicate that there is no power supply to the Access Point.
From L2 function, the EWS is able to check if power is delivered to the Access
Other Monitoring tools such as the AP status monitoring allow quick view of the total Access Point in the layout as well as the number of users connecting to each individual Access point
Number of wireless client activity can be seen in the Wireless Client monitoring for usage loading on the Access Point
The EWS Wireless Management Switch is able to monitor individual Access Point throughput